# Nextcloud

ACHTUNG! In diesem Buch sind nur nextcloudspezifische Tipps &amp; Tricks dokumentiert. Installationsanleitungen sind jeweils im Buch Docker und TrueNAS zu finden, je nachdem, wie man es installieren möchte.

# NGINX Reverse Proxy Manager fuer Nextcloud konfigurieren

### 1) Neuen Proxy Host hinzufuegen:

[![image.png](https://bookstack.eike-f.de/uploads/images/gallery/2023-02/scaled-1680-/2N0image.png)](https://bookstack.eike-f.de/uploads/images/gallery/2023-02/2N0image.png)

[ ](https://bookstack.eike-f.de/uploads/images/gallery/2023-02/S0Zimage.png)

SSL nicht vergessen mit Force SSL an:

[![image.png](https://bookstack.eike-f.de/uploads/images/gallery/2023-02/scaled-1680-/W8Pimage.png)](https://bookstack.eike-f.de/uploads/images/gallery/2023-02/W8Pimage.png)

<p class="callout danger">Evtl gibt es eine Fehlermeldung unter der neuen Domain, dass die Seite nicht zu den vertrauenswuerdigen Seiten zaehlt, ODER es geht nicht weiter, nachdem man auf Anmeldung gedrueckt hat:</p>

[![image.png](https://bookstack.eike-f.de/uploads/images/gallery/2023-02/scaled-1680-/790image.png)](https://bookstack.eike-f.de/uploads/images/gallery/2023-02/790image.png)

Um das zu beheben, muss die config.php von Nextcloud geaendert werden (siehe naechste Seite)

<div id="bkmrk--3" style="background:none;line-height:0px;overflow:hidden;padding:10px 5px;visibility:hidden;opacity:1;width:auto;height:auto;display:none;"></div><div id="bkmrk--4" style="background:none;line-height:0px;overflow:hidden;padding:10px 5px;visibility:visible;opacity:1;width:auto;height:auto;display:none;"></div>

# Nextcloud config.php anpassen fuer trusted domains und SSL

Falls Nextcloud ueber TrueNAS installiert wurde, muss ueber die TrueNAS Oberflaeche auf den Container zugegriffen werden.

### 1) TrueNAS &gt; App &gt; Installed Apps &gt; drei Punkte Menu bei Nextcloud &gt; Shell

[![image.png](https://bookstack.eike-f.de/uploads/images/gallery/2023-02/scaled-1680-/4Ecimage.png)](https://wiki.folkerts.it/uploads/images/gallery/2023-02/4Ecimage.png)

### 2) nicht die postgresql db container auswaehlen, sondern den nextcloud container:

### [![image.png](https://bookstack.eike-f.de/uploads/images/gallery/2023-02/scaled-1680-/urBimage.png)](https://bookstack.eike-f.de/uploads/images/gallery/2023-02/urBimage.png)

### 3) Evtl kommt folgende Fehlermeldung (falls nicht, bei Schritt 4 weitermachen):

[![image.png](https://bookstack.eike-f.de/uploads/images/gallery/2023-02/scaled-1680-/GVSimage.png)](https://bookstack.eike-f.de/uploads/images/gallery/2023-02/GVSimage.png)

 Um das zu beheben, muss man in die Shell des TrueNAS Nodes. Dafuer auf

TrueNAS &gt; System Settings &gt; Shell:

<p class="callout info">bei der Shell Anmeldung einfach den Admin Account der TrueNAS WebUI verwenden</p>

[![image.png](https://bookstack.eike-f.de/uploads/images/gallery/2023-02/scaled-1680-/3Akimage.png)](https://bookstack.eike-f.de/uploads/images/gallery/2023-02/3Akimage.png)

und Kommando eingeben:

```bash
chmod a+r /etc/rancher/k3s/k3s.yaml  
```

[![image.png](https://bookstack.eike-f.de/uploads/images/gallery/2023-02/scaled-1680-/GMZimage.png)](https://bookstack.eike-f.de/uploads/images/gallery/2023-02/GMZimage.png)

### 4) zurueck in der Nextcloud Pod Shell mit nano die config/config.php bearbeiten:

```bash
apt update && apt install nano && nano config/config.php
```

<p class="callout warning">der Befehl muss nach jedem Nextcloud Neustart erneut eingegeben werden, da der Container den Zustand ohne installiertem nano wiederherstellt. Die config.php hingegen befindet sich in einem Volume und wird dauerhaft gespeichert.</p>

vorher:

[![image.png](https://bookstack.eike-f.de/uploads/images/gallery/2023-02/scaled-1680-/Zloimage.png)](https://bookstack.eike-f.de/uploads/images/gallery/2023-02/Zloimage.png)

<p class="callout info">danach  
trusted\_domain hinzufuegen  
overwrite.cli.url anpassen  
overwriteprotocol hinzufuegen (optional!)</p>

nachher

<p class="callout warning">KOMMATA NICHT VERGESSEN</p>

[![image.png](https://bookstack.eike-f.de/uploads/images/gallery/2023-02/scaled-1680-/0xUimage.png)](https://bookstack.eike-f.de/uploads/images/gallery/2023-02/0xUimage.png)

### 5) Nextcloud neustarten (Stop und Start)

[![image.png](https://bookstack.eike-f.de/uploads/images/gallery/2023-02/scaled-1680-/V6Zimage.png)](https://bookstack.eike-f.de/uploads/images/gallery/2023-02/V6Zimage.png)

<div id="bkmrk--7" style="background:none;line-height:0px;overflow:hidden;padding:10px 5px;visibility:visible;opacity:1;width:auto;height:auto;display:none;"></div>

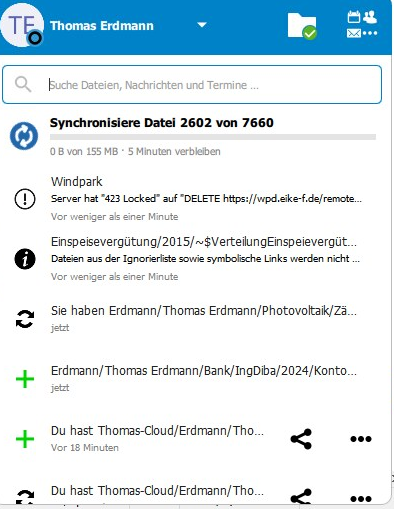
# MariaDB bearbeiten (Fehler 'File locked 423')

423 LOCKED

[![image.png](https://wiki.folkerts.it/uploads/images/gallery/2024-10/scaled-1680-/image.png)](https://wiki.folkerts.it/uploads/images/gallery/2024-10/image.png)
Anleitung siehe  
[https://help.nextcloud.com/t/file-is-locked-how-to-unlock/1883](https://help.nextcloud.com/t/file-is-locked-how-to-unlock/1883)

Wenn eine Datei von Nextcloud gesperrt ist, kann die DB so bearbeitet werden, dass die Sperrung aufgehoben ist.

Dazu

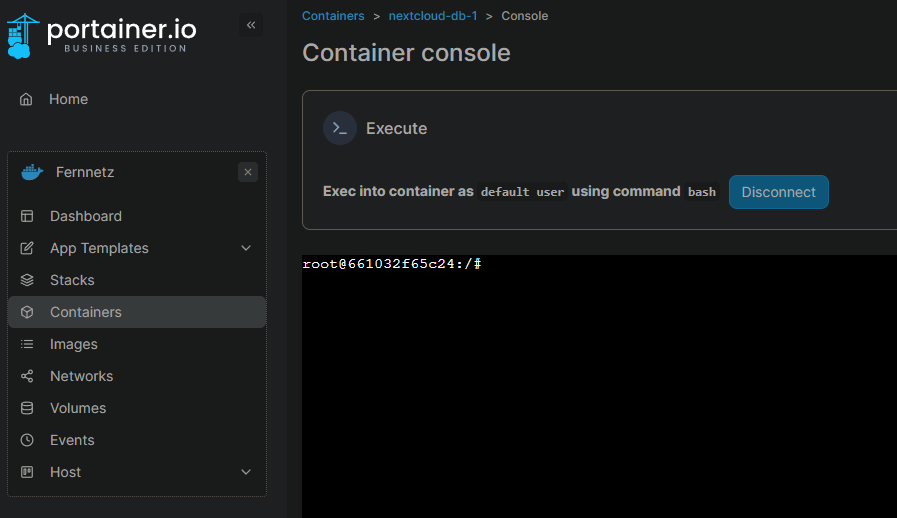
1\) in MariaDB Container mit bash gehen:

[![image.png](https://wiki.folkerts.it/uploads/images/gallery/2023-10/scaled-1680-/image.png)](https://wiki.folkerts.it/uploads/images/gallery/2023-10/image.png)
2\) danach

```bash
mysql -u root -p
```

und das Passwort des root-Benutzers eingeben, zu finden in der docker-compose.yaml:

[![image.png](https://wiki.folkerts.it/uploads/images/gallery/2023-10/scaled-1680-/9E2image.png)](https://wiki.folkerts.it/uploads/images/gallery/2023-10/9E2image.png)
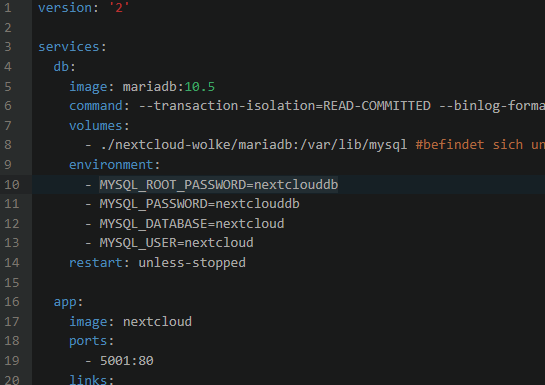
danach ist man in der mariadb:

[![image.png](https://wiki.folkerts.it/uploads/images/gallery/2023-10/scaled-1680-/AJOimage.png)](https://wiki.folkerts.it/uploads/images/gallery/2023-10/AJOimage.png)
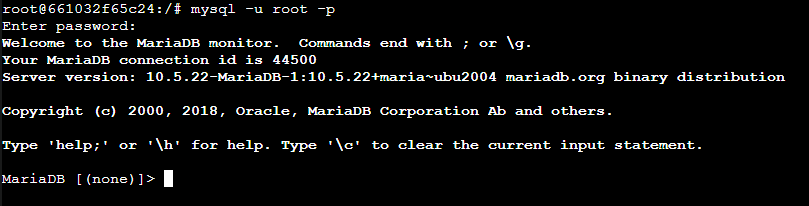
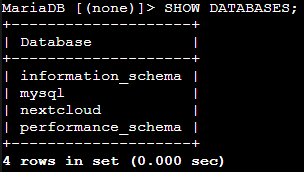
3\) Datenbanken anzeigen mit

```sql
SHOW DATABASES;
```

<p class="callout warning">SEMIKOLON NICHT VERGESSEN!</p>

[![image.png](https://wiki.folkerts.it/uploads/images/gallery/2023-10/scaled-1680-/42Mimage.png)](https://wiki.folkerts.it/uploads/images/gallery/2023-10/42Mimage.png)

4\) in die Database 'nextcloud' gehen mit

```sql
USE nextcloud;
```

[![image.png](https://wiki.folkerts.it/uploads/images/gallery/2023-10/scaled-1680-/hQFimage.png)](https://wiki.folkerts.it/uploads/images/gallery/2023-10/hQFimage.png)

5\) tables anzeigen mit

```sql
SHOW TABLES;
```

[![image.png](https://wiki.folkerts.it/uploads/images/gallery/2023-10/scaled-1680-/2lNimage.png)](https://wiki.folkerts.it/uploads/images/gallery/2023-10/2lNimage.png)
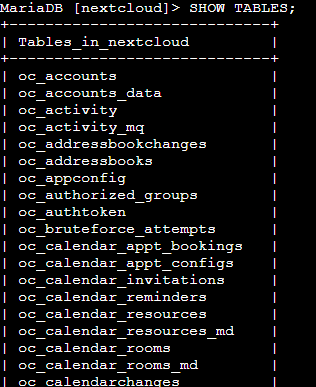
6\) Die Dateisperrungen befinden sich in oc\_file\_locks

```sql
SELECT * FROM oc_file_locks
```

[![image.png](https://wiki.folkerts.it/uploads/images/gallery/2023-10/scaled-1680-/NpLimage.png)](https://wiki.folkerts.it/uploads/images/gallery/2023-10/NpLimage.png)
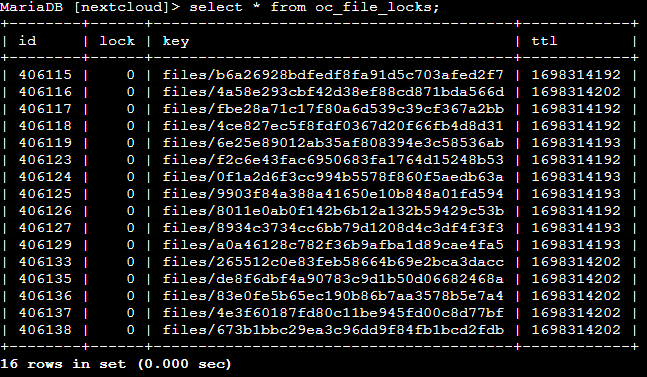
7\) Die gesamte Tabelle soll jetzt gelöscht werden mit

```sql
DELETE FROM oc_file_locks WHERE 1;
```

[![image.png](https://wiki.folkerts.it/uploads/images/gallery/2023-10/scaled-1680-/qPgimage.png)](https://wiki.folkerts.it/uploads/images/gallery/2023-10/qPgimage.png)

Danach sollte die Synchronisation wieder funktionieren.

# Nextcloud FFMPEG in Docker Container installieren

#### FFMPEG für Video Preview bei jedem Update neu ausführen:

docker exec nextcloud-app-1 bash -c "apt update &amp;&amp; apt -y install ffmpeg"

docker exec nextcloud-app-1 bash -c "whereis ffmpeg"

### 2. Möglichkeit: Eigenes Image erstellen mit FFMPEG (nicht ausprobiert)

- 'Dockerfile' erstellen im selben Pfad wie die docker-compose.yaml file:

```yaml
FROM nextcloud

# Install ffmpeg
RUN apt-get update && \
    apt-get install -y ffmpeg && \
    rm -rf /var/lib/apt/lists/*
```

- docker-compose.yaml file erstellen:

```yaml
version: '2'

volumes:
  nextcloud:
  db:
  nextcloud_data:
    driver: local
    driver_opts:
      type: "nfs"
      o: "addr=192.168.178.201,nolock,soft,rw"
      device: ":/mnt/exospool/nextcloud_data"
      
services:
  db:
    image: mariadb:10.6
    restart: always
    command: --transaction-isolation=READ-COMMITTED --log-bin=binlog --binlog-format=ROW
    volumes:
      - db:/var/lib/mysql
    environment:
      - MYSQL_ROOT_PASSWORD=
      - MYSQL_PASSWORD=
      - MYSQL_DATABASE=nextcloud
      - MYSQL_USER=nextcloud

  app:
    build:
      context: .
    restart: always
    ports:
      - 8180:80
    links:
      - db
    volumes:
      - nextcloud:/var/www/html
      - nextcloud_data:/var/www/html/data
    environment:
      - MYSQL_PASSWORD=
      - MYSQL_DATABASE=nextcloud
      - MYSQL_USER=nextcloud
      - MYSQL_HOST=db
```

- custom image erstellen und container starten:

```
docker-compose up -d --build
```

# Joplin Synchronisation mit Nextcloud

Joplin Einstellungen:

[![image.png](https://wiki.folkerts.it/uploads/images/gallery/2024-02/scaled-1680-/image.png)](https://wiki.folkerts.it/uploads/images/gallery/2024-02/image.png)
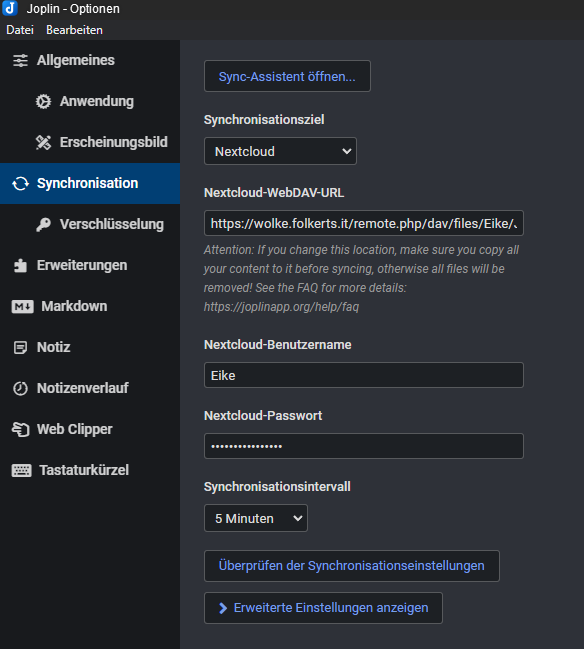
Nextcloud-WebDAV-URL:

[https://NEXTCLOUDURL.com/remote.php/dav/files/NEXTCLOUDNUTZERNAME/ORDNERNAME](https://NEXTCLOUDURL.com/remote.php/dav/files/NUTZERNAME/ORDNERNAME)

also zb

[https://wolke.folkerts.it/remote.php/dav/files/Eike/Joplin-Sync](https://wolke.folkerts.it/remote.php/dav/files/Eike/Joplin-Sync)

verwandt mit

[https://wiki.folkerts.it/books/code-snippets-notes/page/nextcloud-webdav-link](https://wiki.folkerts.it/books/code-snippets-notes/page/nextcloud-webdav-link)

# Nextcloud Befehle CLI und DB

### <span style="color:rgb(155,152,148);font-size:1.666em;font-weight:400;">Interaktiv in der Console</span>

```bash
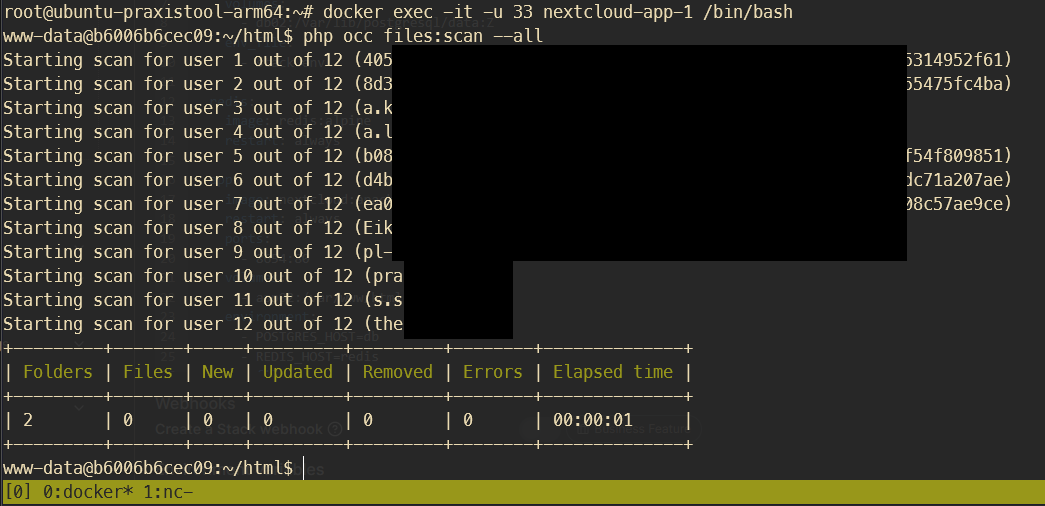
docker exec -it -u 33 nextcloud-app-1 /bin/bash
# im container dann zb sowas ausführen:
php occ files:scan --all
# nur Dateien eines bestimmten Users scannen:
php occ files:scan pl-admin
```

[![image.png](https://wiki.folkerts.it/uploads/images/gallery/2024-08/scaled-1680-/Rrqimage.png)](https://wiki.folkerts.it/uploads/images/gallery/2024-08/Rrqimage.png)

## Autoakzeptieren von Gruppenfreigaben bei neu angelegten Usern

[![image.png](https://wiki.folkerts.it/uploads/images/gallery/2025-01/scaled-1680-/jBFimage.png)](https://wiki.folkerts.it/uploads/images/gallery/2025-01/jBFimage.png)
#### Problem

[https://github.com/nextcloud/server/issues/19520](https://github.com/nextcloud/server/issues/19520)  
[https://github.com/nextcloud/server/issues/18958](https://github.com/nextcloud/server/issues/18958)

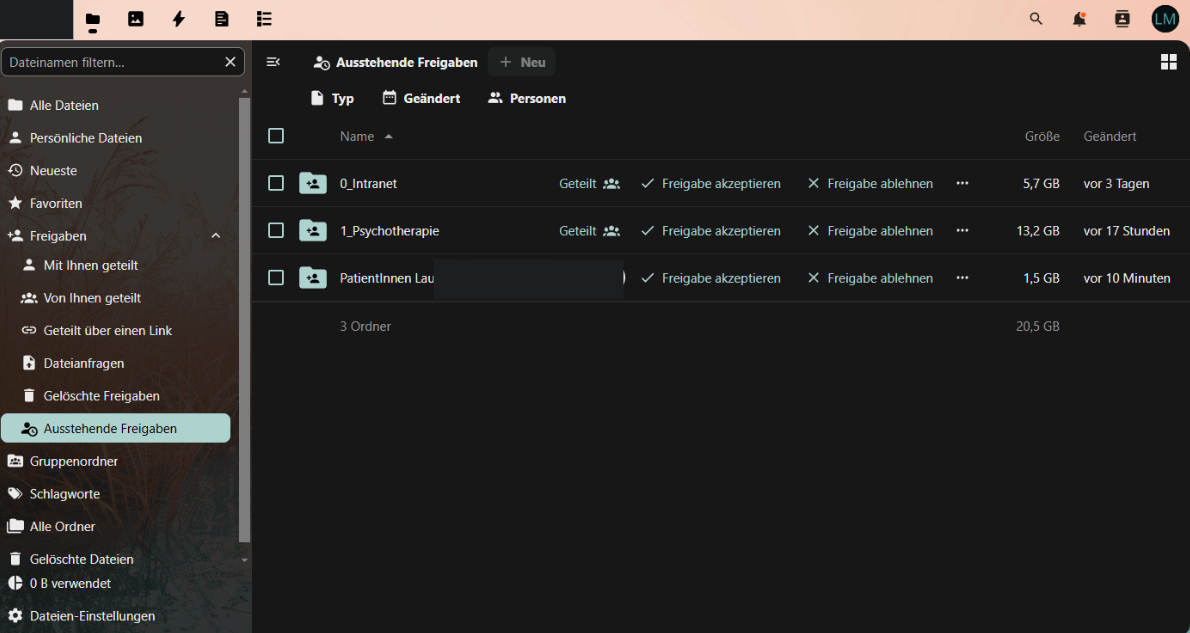
Neu angelegte User müssen zuerst Freigaben im Ordner 'Ausstehende Freigaben' akzeptieren, die mit ihrer Gruppe geteilt sind, bevor die freigegebenen Ordner unter ‘Alle Dateien‘ angezeigt werden.

Erhoffte Lösung: zwei Environment Flags

[https://docs.nextcloud.com/server/latest/admin\_manual/configuration\_server/config\_sample\_php\_parameters.html#sharing-enable-share-accept](https://docs.nextcloud.com/server/latest/admin_manual/configuration_server/config_sample_php_parameters.html#sharing-enable-share-accept)

- sharing.enable\_share\_accept false
- sharing.force\_share\_accept false

Leider keine änderung

#### DB Workaround

[https://github.com/nextcloud/server/issues/19520#issuecomment-2210405574](https://github.com/nextcloud/server/issues/19520#issuecomment-2210405574)

Man kann die PostgreSQL Tabelle 'oc\_share' so abändern, dass der DEFAULT Wert in der Spalte 'accepted' immer 1 ist und nicht 0:

```bash
# interaktiv mit DB-Container verbinden
docker exec -it nextcloud-db-1 /bin/bash


# mit PostgreSQL DB verbinden
psql -U nextcloud nextcloud
# oder bei nextcloud-aio manual-install (dbname, dbuser und dbpassword in config/config.php nachsehen)
psql -U oc_nextcloud -d nextcloud_database


# Für Nextcloud OIDC_user_backend App
# alle bisherigen accepted=0 in =1 ändern:
UPDATE oc_share SET accepted = 1 WHERE accepted = 0;


# Für dauerhaft autoaccept (geht nicht bei Nextcloud OIDC_user_backend App)
# Default von Spalte accepted ändern (bisherige accepted=0 bleiben unverändert)
ALTER TABLE oc_share ALTER COLUMN accepted SET DEFAULT 1;


# weitere Befehle zum Browsen:
# alle Tabellen anzeigen
\dt
# Tabelleninfos anzeigen
\d oc_share
# oc_share anzeigen
SELECT * FROM oc_share;
```

## Dateien in der Datenbank suchen

[![image.png](https://wiki.folkerts.it/uploads/images/gallery/2026-02/scaled-1680-/image.png)](https://wiki.folkerts.it/uploads/images/gallery/2026-02/image.png)
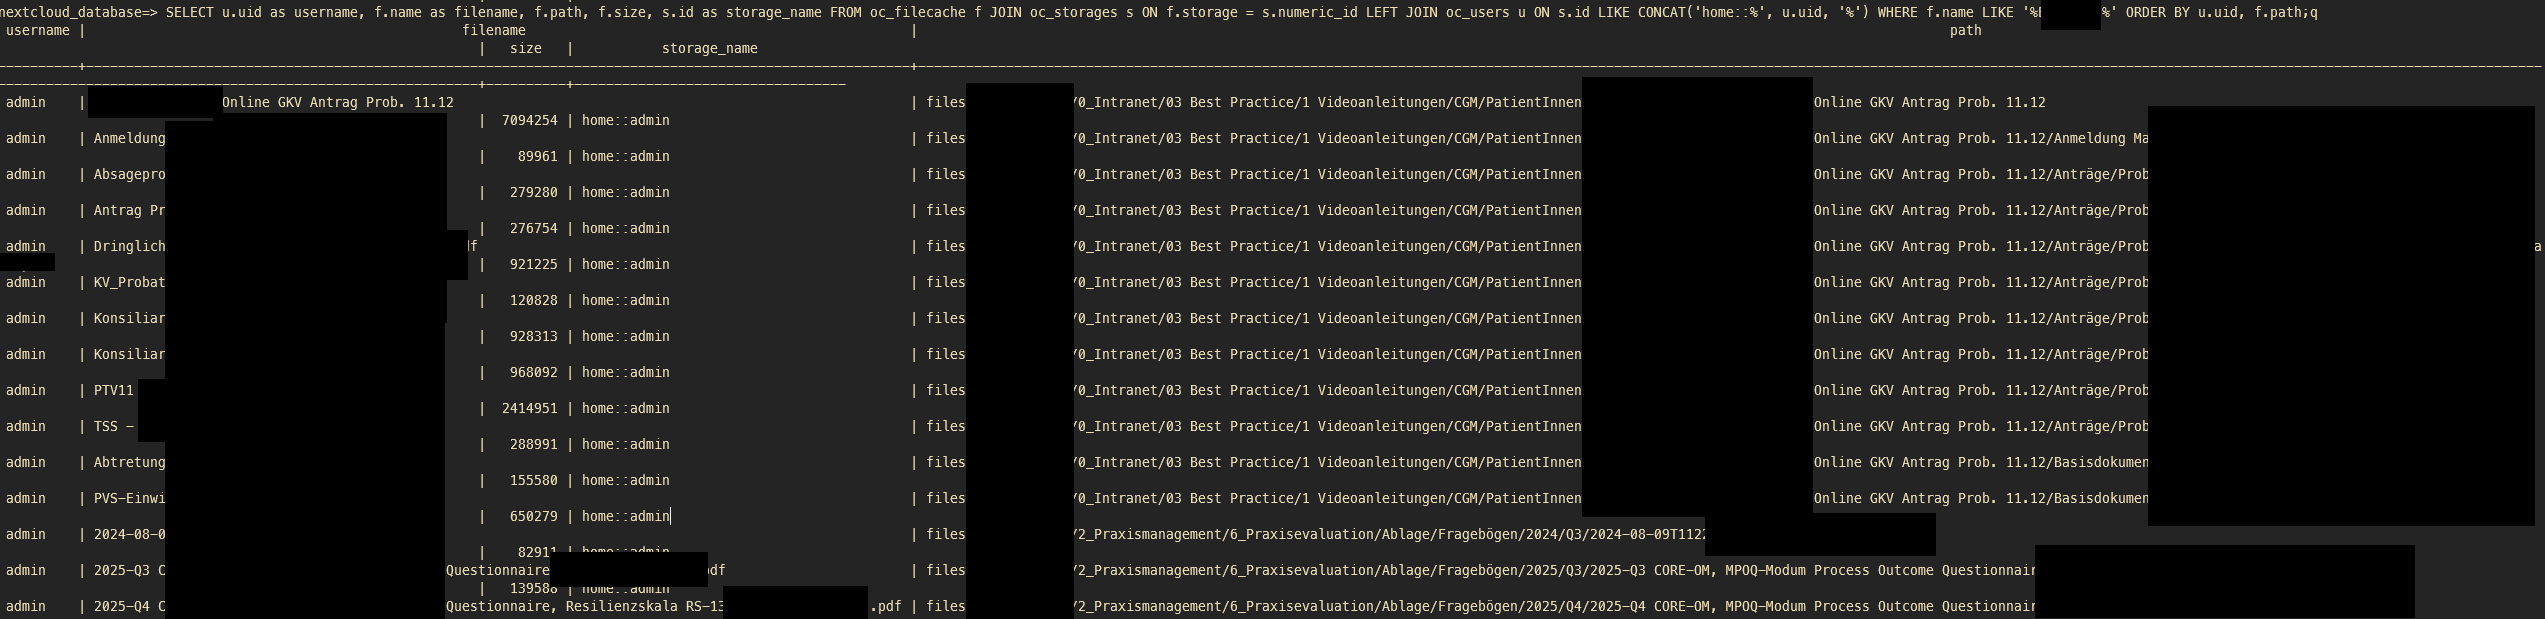
mit postgresql verbinden wie in Punkt DB Workaround

### Dateien allg.

nur Pfad und Timestamp:

```
psql -U oc_nextcloud -d nextcloud_database
```

```mysql
SELECT
    f.path,
    to_timestamp(f.mtime) AS modified,
    CASE
        WHEN f.path LIKE '%files_trashbin%' THEN 'Papierkorb'
        ELSE 'Aktiv'
    END AS status
FROM oc_filecache f
JOIN oc_storages s
    ON f.storage = s.numeric_id
LEFT JOIN oc_users u
    ON s.id LIKE CONCAT('home::%', u.uid, '%')
WHERE
    f.path LIKE '%SUCHBEGRIFF1%'
    AND f.path LIKE '%SUCHBEGRIFF2%'
    AND f.path NOT LIKE '%AUSSCHLUSS1%'
    AND f.path NOT LIKE '%AUSSCHLUSS2%'
ORDER BY
    modified DESC,
    status,
    f.path;
```

Einzeiler:

```sql
SELECT f.path, to_timestamp(f.mtime) AS modified, CASE WHEN f.path LIKE '%files_trashbin%' THEN 'Papierkorb' ELSE 'Aktiv' END AS status FROM oc_filecache f JOIN oc_storages s ON f.storage = s.numeric_id LEFT JOIN oc_users u ON s.id LIKE CONCAT('home::%', u.uid, '%') WHERE f.path LIKE '%SUCHBEGRIFF1%' AND f.path LIKE '%SUCHBEGRIFF2%' AND f.path NOT LIKE '%AUSSCHLUSS1%' AND f.path NOT LIKE '%AUSSCHLUSS2%' ORDER BY modified DESC, status, f.path;
```

### Dateien incl. user und id

```bash
psql -U oc_nextcloud -d nextcloud_database
```

```sql
SELECT 
    u.uid as username,
    f.name as filename,
    f.path,
    f.size,
    s.id as storage_name,
    to_timestamp(f.mtime) as modified,
    CASE 
        WHEN f.path LIKE '%files_trashbin%' THEN 'Papierkorb'
        ELSE 'Aktiv'
    END as status
FROM oc_filecache f
JOIN oc_storages s ON f.storage = s.numeric_id
LEFT JOIN oc_users u ON s.id LIKE CONCAT('home::%', u.uid, '%')
WHERE f.name LIKE '%SUCHBEGRIFF%'
ORDER BY username, status, f.path;

```

danach kommt evtl. eine storage\_id als mountpoint heraus, zb 8e03afba944e9d7a7d880d13a216f39d:

[![image.png](https://wiki.folkerts.it/uploads/images/gallery/2026-02/scaled-1680-/cgQimage.png)](https://wiki.folkerts.it/uploads/images/gallery/2026-02/cgQimage.png)
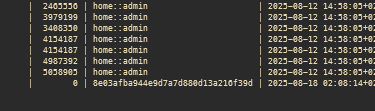
wenn das der Fall ist, kann man mit folgendem Query den Mountpoint herausfinden

```sql
SELECT 
    s.id as storage_id,
    s.numeric_id,
    m.mount_point,
    m.storage_id as mount_storage_id,
    m.root_id
FROM oc_storages s
LEFT JOIN oc_mounts m ON s.numeric_id = m.storage_id
WHERE s.id LIKE '656a%'
ORDER BY m.mount_point;
```

[![image.png](https://wiki.folkerts.it/uploads/images/gallery/2026-02/scaled-1680-/k0timage.png)](https://wiki.folkerts.it/uploads/images/gallery/2026-02/k0timage.png)
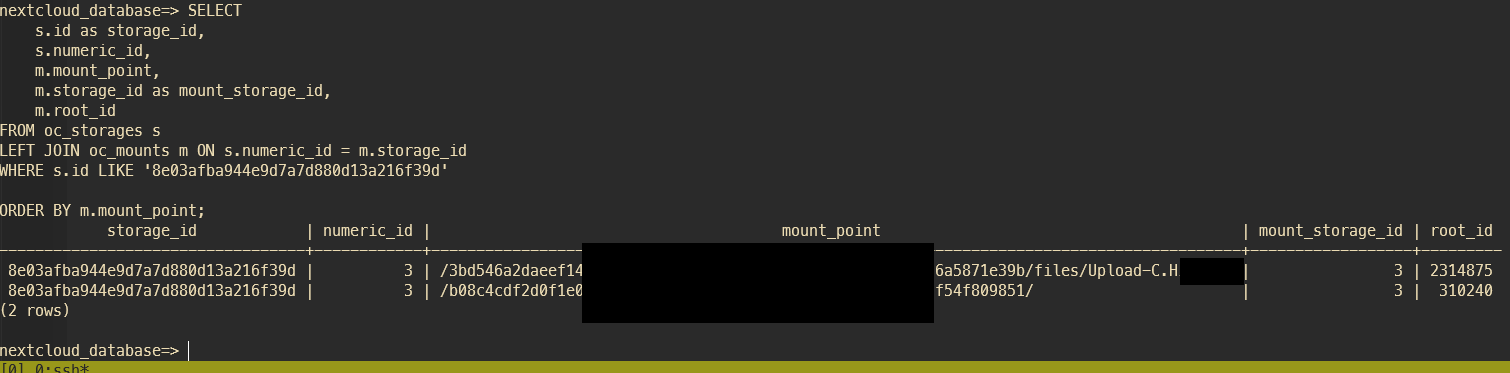
Dann nur noch den User anhand der ID b08c4.... herausfinden, siehe Namen zu User-IDs herausfinden weiter unten:

```sql
SELECT * FROM oc_user_oidc WHERE user_id LIKE '%0654f.........%';
```

[![image.png](https://wiki.folkerts.it/uploads/images/gallery/2026-02/scaled-1680-/xnyimage.png)](https://wiki.folkerts.it/uploads/images/gallery/2026-02/xnyimage.png)

### Gelöschte Dateien in allen Papierkörben

```sql
SELECT 
    u.uid as username, 
    f.name as filename, 
    f.path, 
    f.size, 
    s.id as storage_name 
FROM oc_filecache f
JOIN oc_storages s ON f.storage = s.numeric_id
LEFT JOIN oc_users u ON s.id LIKE CONCAT('home::%', u.uid, '%')
WHERE f.name LIKE '%<SUCHBEGRIFF-DER-DATEI>%'
  AND f.path LIKE '%files_trashbin%'
ORDER BY u.uid, f.path;
```

## Alte Shares löschen

```bash
php occ sharing:delete-orphan-shares
# oder
php occ sharing:delete-orphan-shares -f
```

Quelle: [https://help.nextcloud.com/t/delete-a-zombie-share/110900/5](https://help.nextcloud.com/t/delete-a-zombie-share/110900/5)

## Activities einer Datei/Pfad

ausführlich

```sql
SELECT
    a.activity_id,
    TO_TIMESTAMP(a.timestamp) AS zeitpunkt,
    (ac.data::jsonb)->'displayname'->>'value' AS name,
    a.subject,
    a.file,
    a.subjectparams
FROM oc_activity a
LEFT JOIN oc_accounts ac ON ac.uid = a."user"
WHERE
    a.object_type = 'files'
    AND (
        a.file LIKE '%SUCHBEGRIFF%'
        OR a.subjectparams LIKE '%SUCHBEGRIFF%'
    )
    AND a.subject IN (
        'created_self', 'created_by',
        'deleted_self', 'deleted_by',
        'renamed_self', 'renamed_by',
        'moved_self', 'moved_by',
        'changed_self', 'changed_by'
    )
ORDER BY a.timestamp DESC
LIMIT 50;
```

nur timestamp, file und username, ohne limit

```sql
SELECT
    TO_TIMESTAMP(a.timestamp) AS zeitpunkt,
    (ac.data::jsonb)->'displayname'->>'value' AS name,
    a.file
FROM oc_activity a
LEFT JOIN oc_accounts ac ON ac.uid = a."user"
WHERE
    a.object_type = 'files'
    AND (
        a.file LIKE '%SUCHBEGRUFF%'
        OR a.subjectparams LIKE '%SUCHBEGRUFF%'
    )
    AND a.subject IN (
        'created_self', 'created_by',
        'deleted_self', 'deleted_by',
        'renamed_self', 'renamed_by',
        'moved_self', 'moved_by',
        'changed_self', 'changed_by'
    )
ORDER BY a.timestamp DESC;
```

## Activities einer bestimmten File-ID anzeigen

```bash
# in postgresql docker-container:
psql usw siehe oben
SELECT * FROM oc_activity WHERE object_type = 'files' AND object_id = 'DEINE_FILE_ID' ORDER BY timestamp DESC;
```

[![image.png](https://wiki.folkerts.it/uploads/images/gallery/2025-11/scaled-1680-/image.png)](https://wiki.folkerts.it/uploads/images/gallery/2025-11/image.png)

## Namen zu User-IDs anzeigen

```sql
# reguläre Nextcloud-User anzeigen
SELECT * FROM oc_users;

# OIDC-User anzeigen nach ID sortiert
SELECT * FROM oc_user_oidc;
# OIDC-User anzeigen nach Name sortiert
SELECT * FROM oc_user_oidc ORDER BY display_name;

# Nach speziellem Namen anhand der ID suchen
SELECT * FROM oc_user_oidc WHERE user_id LIKE '%0654f.........%';
```

## Gruppen-IDs anzeigen

```bash
# in postgresql container bashen
docker exec -it nextcloud-db-1 /bin/bash


# in postgresql-db mit nextcloud einloggen
psql -U nextcloud nextcloud
# bzw. für nextcloud-aio manual-install container:
psql -U oc_nextcloud -d nextcloud_database


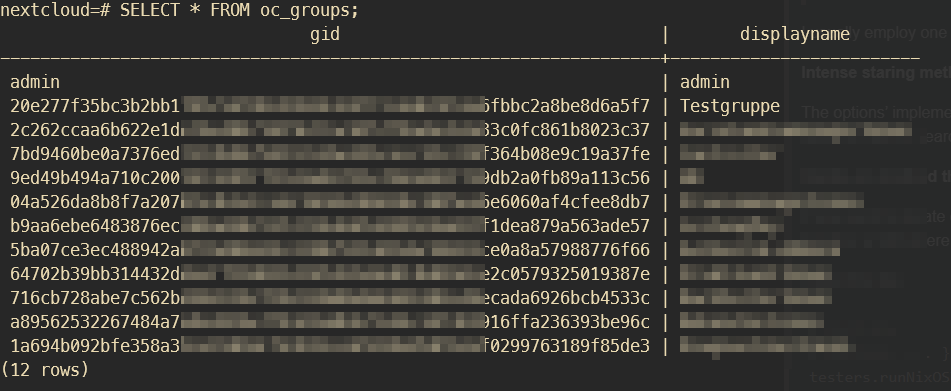
# oc_groups anzeigen
SELECT * FROM oc_groups;
```

[![image.png](https://wiki.folkerts.it/uploads/images/gallery/2025-03/scaled-1680-/Xw6image.png)](https://wiki.folkerts.it/uploads/images/gallery/2025-03/Xw6image.png)

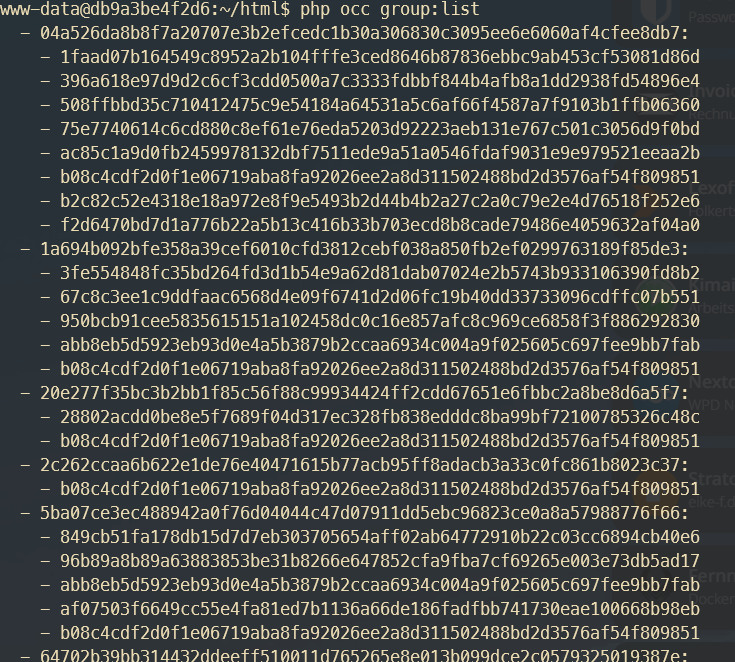
Oder über occ und dann die ID der Benutzer abgleichen und Gruppenbezeichnungen raten:

```bash
docker exec -it -u 33 nextcloud-app-1 /bin/bash
php occ group:list
```

[![image.png](https://wiki.folkerts.it/uploads/images/gallery/2025-03/scaled-1680-/WNmimage.png)](https://wiki.folkerts.it/uploads/images/gallery/2025-03/WNmimage.png)


## groupfolders:scan

<div id="bkmrk--14">  
</div>- `occ groupfolders:create <name>` → create a group folder
- `occ groupfolders:delete <folder_id> [-f|--force]` → delete a group folder and all its contents
- `occ groupfolders:expire` → trigger file version expiration (see [Nextcloud docs](https://docs.nextcloud.com/server/latest/admin_manual/configuration_files/file_versioning.html) for details)
- `occ groupfolders:group <folder_id> <group_name> [-d|--delete] [write|share|delete]` → assign groups and their rights to a group folder
- `occ groupfolders:list` → list configured group folders
- `occ groupfolders:permissions` → configure advanced permissions (see below for details)
- `occ groupfolders:quota <folder_id> [<quota>|unlimited]` → set a quota for a group folder
- `occ groupfolders:rename <folder_id> <name>` → rename a group folder
- `occ groupfolders:scan <folder_id>` → trigger a filescan for a group folder

Quelle: [https://help.nextcloud.com/t/solved-occ-file-scan-not-working-for-groupfolder/94017](https://help.nextcloud.com/t/solved-occ-file-scan-not-working-for-groupfolder/94017)

### Troubleshooting

##### Fehlermeldung beim Befehl files:scan --all

... "file.pdf" will not be accessible due to incompatible encoding ...

[![image.png](https://wiki.folkerts.it/uploads/images/gallery/2025-01/scaled-1680-/bZpimage.png)](https://wiki.folkerts.it/uploads/images/gallery/2025-01/bZpimage.png)

Lösung: [https://github.com/nextcloud/server/issues/3136#issuecomment-579470343](https://github.com/nextcloud/server/issues/3136#issuecomment-579470343)

```bash
apt update
apt install convmv
# Entweder direkt ohne Test oder --notest weglassen um Vorgang zu testen
convmv -f utf-8 -t utf-8 -r --notest --nfc <nextcloud-data-folder>
```

### via Portainer

[https://www.reddit.com/r/NextCloud/comments/croxkm/how\_to\_use\_occ\_scan\_on\_a\_docker\_install/](https://www.reddit.com/r/NextCloud/comments/croxkm/how_to_use_occ_scan_on_a_docker_install/)

[https://docs.nextcloud.com/server/stable/admin\_manual/configuration\_server/occ\_command.html#using-the-occ-command](https://docs.nextcloud.com/server/stable/admin_manual/configuration_server/occ_command.html#using-the-occ-command)

zuerst in den Docker container gehen (zb Portainer oder über Konsole) und folgendes Kommando testen:

```
php occ maintenance:mode --on
```

[![image.png](https://wiki.folkerts.it/uploads/images/gallery/2024-07/scaled-1680-/Lmkimage.png) ](https://wiki.folkerts.it/uploads/images/gallery/2024-07/Lmkimage.png)

[![image.png](https://wiki.folkerts.it/uploads/images/gallery/2024-07/scaled-1680-/iskimage.png)](https://wiki.folkerts.it/uploads/images/gallery/2024-07/iskimage.png)

evtl kommt folgende Fehlermeldung:

```
root@1dfd70a49980:/var/www/html# php occ maintenance:mode --on
Console has to be executed with the user that owns the file config/config.php
Current user id: 0
Owner id of config.php: 33
Try adding 'sudo -u #33' to the beginning of the command (without the single quotes)
If running with 'docker exec' try adding the option '-u 33' to the docker command (without the single quotes)
```

danach die Konsole des Containers nochmal starten, diesmal mit dem vorgeschlagenen Nutzer (user id 33 in meinem Fall, wie in der Ausgabe vorgeschlagen):

[![image.png](https://wiki.folkerts.it/uploads/images/gallery/2024-07/scaled-1680-/F0Timage.png)](https://wiki.folkerts.it/uploads/images/gallery/2024-07/F0Timage.png)

und dann

`./occ maintenance:mode --on`

oder wenn man kein portainer nutzt:

```
docker exec container_name sudo -u 33 php7 /var/www/html/occ files:scan --all
```

[![image.png](https://wiki.folkerts.it/uploads/images/gallery/2024-07/scaled-1680-/6TKimage.png)](https://wiki.folkerts.it/uploads/images/gallery/2024-07/6TKimage.png)

WICHTIG

auf den Ordner achten. Auszug aus dem reddit post (siehe oben)

With something like this, the path to occ is important. It's either under `/config/www/nextcloud` or `/var/www/html`.  
Also, if you see occ but you can't run commands like so - `occ files:scan <user>` then `./occ files:scan <user>` can sometimes fix it.

# Authentik als IdP

[https://docs.goauthentik.io/integrations/services/nextcloud/](https://docs.goauthentik.io/integrations/services/nextcloud/)

# Aktualisierung erforderlich

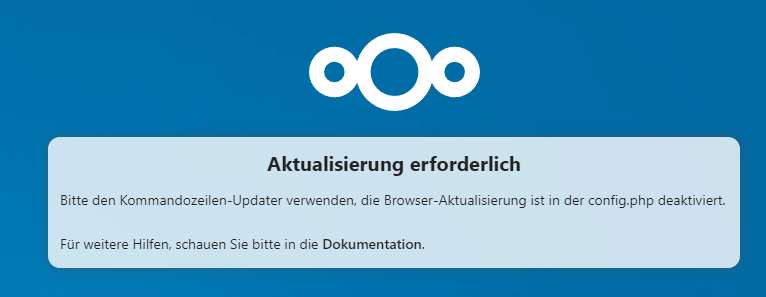
<p class="callout info">Fehlermeldung:  
Aktualisierung erforderlich  
Bitte den Kommandozeilen-Updater verwenden, die Browser-Aktualisierung ist in der config.php deaktiviert.  
Für weitere Hilfen, schauen Sie bitte in die Dokumentation.</p>

[![image.png](https://wiki.folkerts.it/uploads/images/gallery/2024-11/scaled-1680-/s4uimage.png)](https://wiki.folkerts.it/uploads/images/gallery/2024-11/s4uimage.png)

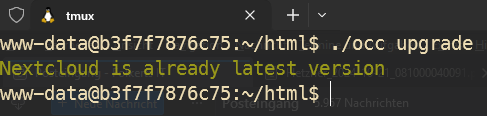
Wenn ein neues Nextcloud Docker-Image gezogen wurde, muss die Nextcloud-Instanz evtl. über die CLI geupdatet werden.

Dazu auf dem Docker host:

```
docker exec -it -u 33 nextcloud-app-1 /bin/bash
```

um im Nextcloud App Container dann folgendes einzugeben:

```
./occ upgrade
```

[![image.png](https://wiki.folkerts.it/uploads/images/gallery/2024-11/scaled-1680-/Jnwimage.png)](https://wiki.folkerts.it/uploads/images/gallery/2024-11/Jnwimage.png)
# Gruppen-IDs anzeigen

```bash
# in postgresql container bashen
docker exec -it nextcloud-db-1 /bin/bash

# in postgresql-db mit nextcloud einloggen
psql -U nextcloud nextcloud
# bzw. für nextcloud-aio manual-install container:
psql -U oc_nextcloud -d nextcloud_database

# oc_groups anzeigen
SELECT * FROM oc_groups;
```

[![image.png](https://wiki.folkerts.it/uploads/images/gallery/2025-03/scaled-1680-/Xw6image.png)](https://wiki.folkerts.it/uploads/images/gallery/2025-03/Xw6image.png)
Oder über occ und dann die ID der Benutzer abgleichen und Gruppenbezeichnungen raten:

```
docker exec -it -u 33 nextcloud-app-1 /bin/bash
php occ group:list
```

[![image.png](https://wiki.folkerts.it/uploads/images/gallery/2025-03/scaled-1680-/WNmimage.png)](https://wiki.folkerts.it/uploads/images/gallery/2025-03/WNmimage.png)
# groupfolders:scan

- `occ groupfolders:create <name>` → create a group folder
- `occ groupfolders:delete <folder_id> [-f|--force]` → delete a group folder and all its contents
- `occ groupfolders:expire` → trigger file version expiration (see [Nextcloud docs](https://docs.nextcloud.com/server/latest/admin_manual/configuration_files/file_versioning.html) for details)
- `occ groupfolders:group <folder_id> <group_name> [-d|--delete] [write|share|delete]` → assign groups and their rights to a group folder
- `occ groupfolders:list` → list configured group folders
- `occ groupfolders:permissions` → configure advanced permissions (see below for details)
- `occ groupfolders:quota <folder_id> [<quota>|unlimited]` → set a quota for a group folder
- `occ groupfolders:rename <folder_id> <name>` → rename a group folder
- `occ groupfolders:scan <folder_id>` → trigger a filescan for a group folder

Quelle: [https://help.nextcloud.com/t/solved-occ-file-scan-not-working-for-groupfolder/94017](https://help.nextcloud.com/t/solved-occ-file-scan-not-working-for-groupfolder/94017)

# Desktop Client Linux - Virtual Files support

[https://www.reddit.com/r/NextCloud/comments/13rkprn/is\_there\_any\_option\_for\_virtual\_filesystem\_on/](https://www.reddit.com/r/NextCloud/comments/13rkprn/is_there_any_option_for_virtual_filesystem_on/)

[https://help.nextcloud.com/t/virtual-files-on-ubuntu-desktop/124668](https://help.nextcloud.com/t/virtual-files-on-ubuntu-desktop/124668)

[https://launchpad.net/~nextcloud-devs/+archive/ubuntu/client](https://launchpad.net/~nextcloud-devs/+archive/ubuntu/client)

```
sudo add-apt-repository ppa:nextcloud-devs/client
sudo apt update
```

```
Stock Ubuntu with Nautilus: sudo apt install nautilus-nextcloud
KDE Ubuntu with Dolphin: sudo apt install dolphin-nextcloud
Ubuntu MATE with Caja: sudo apt install caja-nextcloud
Ubuntu Mint with Nemo: sudo apt install nemo-nextcloud
Other, or if you don't want/need the file manager integration: sudo apt install nextcloud-desktop
```

```
nano /home/yourusername/.config/Nextloud/nextcloud.config

[General]
...
showExperimentalOptions=true
```

Suchbegriffe Nextcloud Virtuelle Dateien

# Windows: Alle Dateien neuer als <Datum> verschieben

Aktuellste Dateien verschieben, wenn Nextcloud Desktop Client neu installiert werden soll um Sync-Probleme zu beheben oder auf virtuelle Dateien umzusteigen

```powershell
$Source = "C:\Users\lbrin\Nextcloud_2025_01_14"
$Target = "C:\Users\lbrin\Nextcloud_2025_01_14_backup"
$Cutoff = [datetime]::ParseExact("01.12.2025","dd.MM.yyyy",$null)

$log = Join-Path $Target ("move-log-" + (Get-Date -Format "yyyyMMdd-HHmmss") + ".txt")
New-Item -ItemType Directory -Path $Target -Force | Out-Null

function Get-FilesSafe {
    param([string]$Root)

    $stack = New-Object System.Collections.Generic.Stack[string]
    $stack.Push($Root)

    while ($stack.Count -gt 0) {
        $dir = $stack.Pop()

        try {
            # Inhalte dieses Ordners lesen (kann fehlschlagen, wenn Nextcloud gerade umräumt)
            $items = Get-ChildItem -LiteralPath $dir -Force -ErrorAction Stop
        }
        catch {
            Add-Content -LiteralPath $log -Value ("SKIP DIR (not found/accessible): " + $dir + " | " + $_.Exception.Message)
            continue
        }

        foreach ($it in $items) {
            if ($it.PSIsContainer) {
                $stack.Push($it.FullName)
            } else {
                $it
            }
        }
    }
}

$files = Get-FilesSafe -Root $Source | Where-Object {
    $_.CreationTime -gt $Cutoff -or $_.LastWriteTime -gt $Cutoff
}

foreach ($f in $files) {
    try {
        $relative = $f.FullName.Substring($Source.TrimEnd('\').Length).TrimStart('\')
        $destPath = Join-Path $Target $relative
        $destDir  = Split-Path -Path $destPath -Parent

        New-Item -ItemType Directory -Path $destDir -Force | Out-Null

        Move-Item -LiteralPath $f.FullName -Destination $destPath -Force -ErrorAction Stop
        Add-Content -LiteralPath $log -Value ("MOVED: " + $f.FullName + " -> " + $destPath)
    }
    catch {
        Add-Content -LiteralPath $log -Value ("FAIL FILE: " + $f.FullName + " | " + $_.Exception.Message)
    }
}

"Fertig. Log: $log"

```