# Home Assistant

# Passwort reset

```bash
auth reset --username existing_user --password new_password
```

# Aqara H1 Tasten (Zigbee)

Quelle:

[https://community.home-assistant.io/t/aqara-h1-button-press-not-triggering-automation/389498/5](https://community.home-assistant.io/t/aqara-h1-button-press-not-triggering-automation/389498/5)

Hi,

I had some problem, and it’s because of the “operation mode” the switch is in. As you’ve found out, your switch will only trigger the “alternate” mode event rather than the individual sides.

Changing this is reasonably easy. Find the device from your devices/integration page.

Click manage clusters in bottom left.

Select the AqaraRemoteManuSpecificCluster option from the drop down.

Select “operation\_mode” from the attribute drop down list:  
![image](https://community-assets.home-assistant.io/original/4X/4/c/1/4c1e4e844b59a01bc1f761e85b5be609f4eb8c21.png)

Now click a switch button 5 times and as soon as the LED flashes blue click “get Zigbee Attribute”. If Home Assistant can reach your switch the value will populate as “0” as in my last screenshot.

Now, change the value to “1” and the manufacturer override code as “4447”.

Wake the device again by pressing a switch 5 times an as soon as it’s flashing, hit the “set zigbee attribute button”.

If this worked correctly, you should be able to go back to an automation and you’ll find the left/right presses are now working as you’d expect. If not, go back to the cluster and the attribute mentioned below, and make sure when you “get” the attribute, it’s coming back as “1” and not “0”. If it comes back as “0” it means your “set” command didn’t work and you’ll have to keep trying to wake and set until it works ![:slight_smile:](https://community.home-assistant.io/images/emoji/twitter/slight_smile.png?v=10 ":slight_smile:")

# Tasmota (Gosund SP111)

### Web-UI

Nach dem Flashvorgang mit dem Tasmota WLAN verbinden, SSID-Name zb tasmota-1021. Danach die url

```
http://192.168.4.1
```

aufrufen und mit vorhandenem WLAN verbinden

### Statische IP

In Tasmota Console statische IP-Adresse eingeben:

```
savedata 1
ipaddress1 192.168.1.50
savedata 0
```

Quelle: [https://www.smarthome-tricks.de/esp8266/tasmota-feste-ip-adresse-zuweisen/](https://www.smarthome-tricks.de/esp8266/tasmota-feste-ip-adresse-zuweisen/)

### Gosund SP111 v1.1 Tasmota Template

unter Configuration &gt; Configure Other bei Template eingeben:

```
{"NAME":"SP111 v1.1","GPIO":[56,0,158,0,132,134,0,0,131,17,0,21,0],"FLAG":0,"BASE":45}
```

unter Configuration &gt; Configure Module das SP111 v1.1 auswählen.

Quelle: [https://templates.blakadder.com/gosund\_SP111\_v1\_1](https://templates.blakadder.com/gosund_SP111_v1_1)

### MQTT senden bei Änderung der Leistungsmessung um 10%

Console &gt; `PowerDelta 10`  
Quelle: [https://tasmota.github.io/docs/Commands/#powerdelta](https://tasmota.github.io/docs/Commands/#powerdelta) und [https://github.com/arendst/Tasmota/discussions/14933](https://github.com/arendst/Tasmota/discussions/14933)

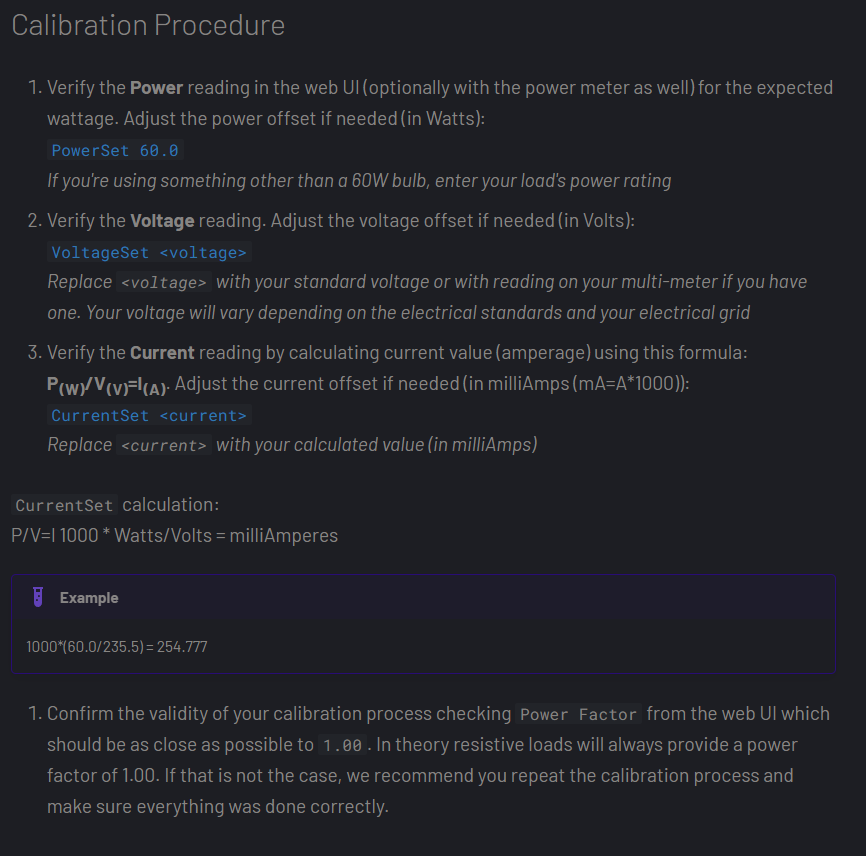
### Energiemessung kalibrieren

[https://tasmota.github.io/docs/Power-Monitoring-Calibration/#setup](https://tasmota.github.io/docs/Power-Monitoring-Calibration/#setup)

[![image.png](https://wiki.folkerts.it/uploads/images/gallery/2023-11/scaled-1680-/image.png)](https://wiki.folkerts.it/uploads/images/gallery/2023-11/image.png)
### Tasmota Updaten

Beim Updaten folgende Reihenfolge der Versionen einhalten:

[![image.png](https://wiki.folkerts.it/uploads/images/gallery/2023-11/scaled-1680-/euBimage.png)](https://wiki.folkerts.it/uploads/images/gallery/2023-11/euBimage.png)

Links zum kopieren:

```
http://ota.tasmota.com/tasmota/release-7.2.0/tasmota-lite.bin
http://ota.tasmota.com/tasmota/release-8.5.1/tasmota-lite.bin
http://ota.tasmota.com/tasmota/release-9.1.0/tasmota-lite.bin.gz
http://ota.tasmota.com/tasmota/release/tasmota.bin.gz
```

Quelle: [https://tasmota.github.io/docs/Upgrading/#upgrade-flow](https://tasmota.github.io/docs/Upgrading/#upgrade-flow)

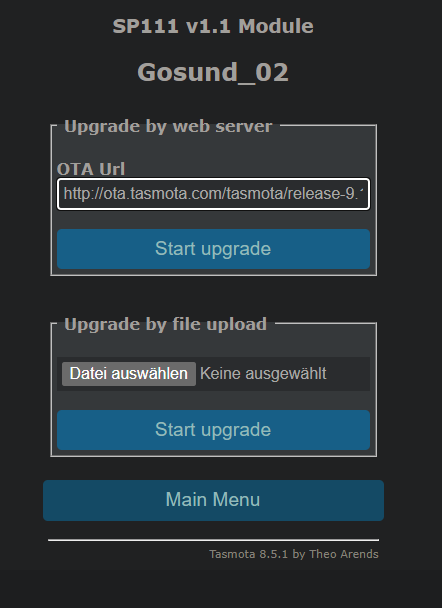
Link der tasmota.bin kopieren und in die Web-UI unter Firmware Upgrade &gt; OTA Url eintragen

zb:

[![image.png](https://wiki.folkerts.it/uploads/images/gallery/2023-11/scaled-1680-/wOqimage.png)](https://wiki.folkerts.it/uploads/images/gallery/2023-11/wOqimage.png)

start upgrade.

<p class="callout warning">BACKUP VON GOSUND\_02 IM ANHANG DIESES EINTRAGS</p>

# Dezibelmesser mit ESPHome

<div id="bkmrk-https%3A%2F%2Fpeyanski.com"><div>[https://peyanski.com/diy-smart-sound-sensor-for-home-automation/](https://peyanski.com/diy-smart-sound-sensor-for-home-automation/)</div><div></div></div>[https://gist.github.com/peyanski/48691397d4cb1acfc4af56c0232342e2](https://gist.github.com/peyanski/48691397d4cb1acfc4af56c0232342e2)

1. ESPHome als Add-On unter Home Assistant installieren
2. Add Device unter ESPHome
3. Open ESPHome Web - AM BESTEN CHROME VERWENDEN (nicht Brave)
4. USB Kabel mit ESP32 oder ESP8266 verbinden
5. COM Port auf ESPHome Web auswählen und 'Prepare for first install'
6. config in ESPHome editieren:

```yaml
esphome:
  name: esphome-web-b1157d
  friendly_name: Dezibelmesser

esp8266:
  board: esp01_1m

# Enable logging
logger:

# Enable Home Assistant API
api:
  encryption:
    key: "ePn+9..........9kAnOCQ="

ota:

wifi:
  ssid: !secret wifi_ssid
  password: !secret wifi_password
  use_address: 192.168.178.58
  manual_ip:
    static_ip: 192.168.178.58
    gateway: 192.168.178.1
    subnet: 255.255.255.0

  # Enable fallback hotspot (captive portal) in case wifi connection fails
  ap:
    ssid: "Esphome-Web-B1157D"
    password: "bp1.....Ih"

captive_portal:

web_server:
  port: 80
  
# https://peyanski.com/diy-smart-sound-sensor-for-home-automation/
# https://gist.github.com/peyanski/48691397d4cb1acfc4af56c0232342e2
globals:

  - id: esphome_sensitivity
    type: float
    initial_value: '36.5'
    restore_value: yes

  - id: esphome_volume
    type: int

sensor:
  - platform: adc
    pin: A0
    id: esphome_db
    device_class: signal_strength
    name: "Db SoundEsp"
    icon: "mdi:volume-vibrate"
    unit_of_measurement: "db"
    update_interval: 2s
    raw: true
    filters:
      - lambda: |-
          unsigned int sample;
          unsigned long startMillis= millis(); 
          float peakToPeak = 0; 
          unsigned int signalMax = 0;
          unsigned int signalMin = 1024;
          while (millis() - startMillis < 500) {
            sample = analogRead(A0);
            if (sample < 1024){
                if (sample > signalMax){
                    signalMax = sample;
                }
                else if (sample < signalMin){
                    signalMin = sample;
                }
              }
          }
          peakToPeak = map((signalMax - signalMin),1,1024,1.5,1024);
          id(esphome_volume) = peakToPeak;
          float state = id(esphome_sensitivity)*log10(peakToPeak)+15;  
          return(state);
  - platform: template
    name: "Volume SoundEsp"
    icon: "mdi:volume-high"
    unit_of_measurement: "%"
    update_interval: 2s
    lambda: return(map((id(esphome_db).state),15,150,0,100));

  - platform: template
    name: "RAW SoundEsp"
    icon: "mdi:volume-source"
    unit_of_measurement: "%"
    update_interval: 2s
    lambda: return(map(id(esphome_volume),1,1024,0,100));

number:
  - platform: template
    id: sensitivity_slider
    name: "Sensitivity SoundEsp"
    icon: "mdi:knob"
    update_interval: 5s
    initial_value: "36.5"
    step: 0.1
    min_value: 20
    max_value: 40
    mode: slider
    set_action:
      then:
        - lambda:  id(esphome_sensitivity) = x;
```

7\. In Home Assistant zu Dienste &amp; Geräte gehen und das gefunden ESPHome Gerät (Dezibelmesser) einbinden:

[![image.png](https://wiki.folkerts.it/uploads/images/gallery/2023-11/scaled-1680-/J7Vimage.png)](https://wiki.folkerts.it/uploads/images/gallery/2023-11/J7Vimage.png)

# Bugfix: Speedtest nicht verfügbar

[https://github.com/home-assistant/core/issues/100001#issuecomment-1817546313](https://github.com/home-assistant/core/issues/100001#issuecomment-1817546313)

```yaml
alias: Speedtest integration reload when unavailable
description: >-
  Force speedtest when download unavailable for several minutes. Fix for
  accidental failure of the integration.
trigger:
  - platform: state
    entity_id:
      - sensor.speedtest_download
    to: unavailable
    for:
      hours: 0
      minutes: 5
      seconds: 0
condition: []
action:
  - service: homeassistant.update_entity
    data: {}
    target:
      entity_id: sensor.speedtest_download
mode: single
```

# HA-VM installieren mit virt-install unter Linux Ubuntu

```bash
sudo apt update
sudo apt install -y qemu-kvm libvirt-daemon-system libvirt-clients bridge-utils virtinst
sudo adduser $USER libvirt
# Neu einloggen oder 'newgrp libvirt' damit die Gruppe aktiv wird

```

```bash
# Namen deines Ethernet-Interfaces herausfinden:
ip link show

# gucken, ob vorhanden yamls im verzeichnis /etc/netplan sind (zb durch cloud-init mit prio 50-cloud-init.yaml) und diese anpassen oder mit höherer prio setzen
# sudo nano /etc/netplan/01-netcfg.yaml
network:
  version: 2
  ethernets:
    enp3s0:          # ← deinen Interface-Namen eintragen
      dhcp4: false
  bridges:
    br0:
      interfaces: [enp3s0]
      dhcp4: true
      parameters:
        stp: false
        forward-delay: 0


sudo chmod 600 /etc/netplan/01-netcfg.yaml
sudo netplan try

sudo netplan apply
ip addr show br0   # br0 sollte jetzt eine IP haben
```

```bash
wget https://github.com/home-assistant/operating-system/releases/download/17.1/haos_ova-17.1.qcow2.xz

xz -d haos_ova-17.1.qcow2.xz

sudo mv haos_ova-17.1.qcow2 /var/lib/libvirt/images/homeassistant.qcow2
sudo chown libvirt-qemu:kvm /var/lib/libvirt/images/homeassistant.qcow2
```

```bash
sudo virt-install \
  --name homeassistant \
  --description "Home Assistant OS" \
  --os-variant generic \
  --ram 4096 \
  --vcpus 4 \
  --disk /var/lib/libvirt/images/homeassistant.qcow2,bus=scsi \
  --controller type=scsi,model=virtio-scsi \
  --network bridge=br0,model=virtio \
  --graphics none \
  --boot uefi \
  --import \
  --noautoconsole 
# Mit --noautoconsole bleibt das Terminal frei


### Optional mit USB-Device durchschleifen:
lsusb

#output zb:
#Bus 004 Device 001: ID 1d6b:0003 Linux Foundation 3.0 root hub
#Bus 003 Device 004: ID 30c9:0052 Luxvisions Innotech Limited Integrated RGB Camera
#Bus 003 Device 003: ID 1a86:55d4 QinHeng Electronics SONOFF Zigbee 3.0 USB Dongle Plus V2

# Zigbee Dongle bei "Bus 003 Device 003" somit
# --hostdev 003.003
# an Befehl anhängen:
sudo virt-install \
  --name homeassistant \
  --description "Home Assistant OS" \
  --os-variant generic \
  --ram 4096 \
  --vcpus 4 \
  --disk /var/lib/libvirt/images/homeassistant.qcow2,bus=scsi \
  --controller type=scsi,model=virtio-scsi \
  --network bridge=br0,model=virtio \
  --graphics none \
  --boot uefi \
  --import \
  --noautoconsole \
  --hostdev 003.003
# oder besser ID (vendor:product) aus lsusb holen 
  --hostdev 10c4:ea60
# oder für's hinzufügen im Nachhinein:
sudo virsh attach-device homeassistant /dev/stdin --persistent << EOF
<hostdev mode='subsystem' type='usb' managed='yes'>
  <source>
    <vendor id='0x10c4'/>
    <product id='0xea60'/>
  </source>
</hostdev>
EOF
```

```bash
sudo virsh list --all

# Nach ca. 2–3 Minuten IP abfragen (wird evtl nicht angezeigt weil VM den QEMU Guest Agent benötigt. Siehe unten um IP herauszufinden)
sudo virsh domifaddr homeassistant

# VM zum Autostart hinzufügen
sudo virsh autostart homeassistant

# Auf Console der VM zugreifen (escape aus der Console mit STRG+])
sudo virsh console homeassistant

# Login username VM-Console
homeassistant login: root

# IP aus VM-Console herausfinden
ha network info
# zeigt etwa sowas an:
# ha network info
#docker:
#  address: 172.30.32.0/23
#  dns: 172.30.32.3
#  gateway: 172.30.32.1
#  interface: hassio
#host_internet: true
#interfaces:
#- connected: true
#  enabled: true
#  interface: enp0s2
#  ipv4:
#    address:
#    - 10.1.1.242/24

# Home Assistant einrichten
Nach ca. 5–10 Minuten (erster Boot bereitet das System vor) im Browser aufrufen:
http://<IP-der-VM>:8123

oder falls mDNS im LAN funktioniert:
http://homeassistant.local:8123
```

hilfreiche cmds:

```bash
sudo virsh list --all                                        # Status aller VMs
sudo virsh shutdown homeassistant                            # Sauber herunterfahren
sudo virsh snapshot-create-as homeassistant snap-vor-update  # Snapshot anlegen
sudo virsh console homeassistant                             # In Shell der VM gehen
```